How to Create a Unique Photography Studio Design
Creating Functional and Inspiring Zones
Planning Your Photography Studio Zones
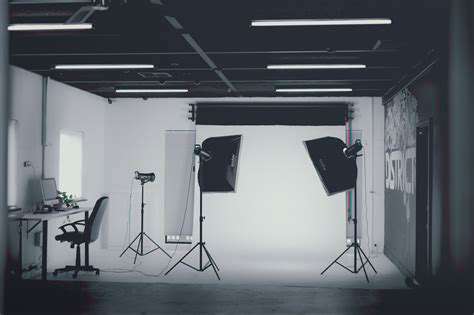
When designing a photography studio, the first step involves meticulous zone planning based on your photographic specialties. A portrait studio demands completely different spatial and lighting requirements compared to a product photography workspace. Through careful consideration of each area's purpose, you'll create an environment that enhances both productivity and artistic expression. This foundational planning phase ultimately determines how effectively your studio will function.
Before finalizing any layouts, I recommend physically sketching multiple configurations. Document potential placements for lighting rigs, prop stations, background systems, and other essential equipment. This visualization process allows for practical refinements before implementing the actual studio setup.
Lighting Considerations for Each Zone
Photography fundamentally revolves around light manipulation. Each dedicated zone requires customized lighting solutions tailored to its specific photographic needs. Portrait areas typically benefit from soft, diffused lighting that flatters human subjects, while product photography spaces often need precisely controlled directional lighting to highlight material details and textures.
The market offers diverse lighting equipment including continuous lights, strobes, and speedlights. Mastering the technical aspects of color temperature (measured in Kelvin) and light intensity (measured in lumens) will dramatically improve your final image quality across all photography genres.
Backdrops and Props for Visual Appeal
Your choice of backdrops and props significantly influences the visual narrative of your photographs. Select background systems that align with each zone's primary function - seamless paper for clean product shots or textured fabrics for creative portraiture. A thoughtfully assembled prop collection adds dimensionality and character to your images, so prioritize versatile, high-quality items that offer multiple creative applications.
Ensuring Ample Space and Organization
An efficiently organized studio directly correlates with creative productivity. Allocate sufficient square footage in each zone for equipment movement, client interaction, and prop storage. Implement modular storage solutions like labeled bins and adjustable shelving to maintain an orderly environment. This systematic approach minimizes setup time between shoots and keeps your creative focus sharp.
Creating a Mood Board for Each Zone
Develop comprehensive mood boards for every studio zone by collecting inspirational images, color swatches, and material samples. These visual references will guide your design decisions regarding backdrops, props, and overall aesthetic cohesion. Many professional photographers find physical mood boards more effective than digital versions for tactile reference during shoots.
Budgeting and Sourcing Materials
Studio creation requires strategic financial planning. Prepare a detailed budget spreadsheet accounting for equipment purchases, material costs, and potential construction expenses. Research suppliers thoroughly - sometimes local vendors offer better pricing on backdrops and props than major online retailers. Consider upcycling furniture or building DIY props to stretch your budget further without sacrificing quality.
Maintaining a Safe and Clean Environment
Implement regular cleaning protocols to preserve equipment and ensure client safety. Schedule weekly deep cleaning sessions and daily quick cleanups. Pay special attention to electrical safety - use cable management systems and regularly inspect all lighting equipment. A well-maintained studio not only looks professional but also prevents costly equipment damage and potential liability issues.
Incorporating Unique Design Elements and Features
Unique Color Palettes
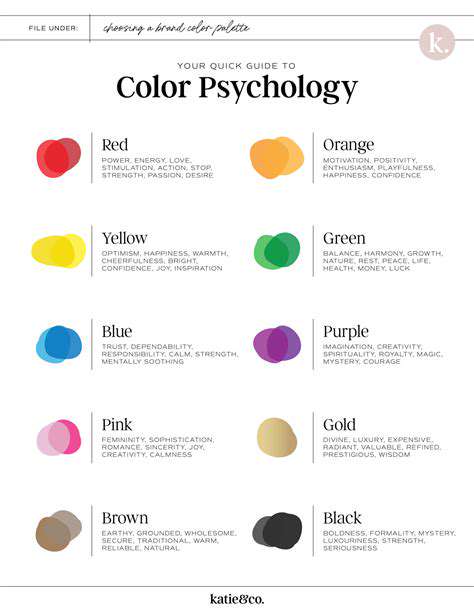
Strategic color scheme implementation can dramatically impact your studio's creative potential. Explore unconventional combinations like ochre with slate gray or mauve with forest green. These distinctive palettes create memorable visual signatures in your portfolio. Consider painting accent walls or using colored gels on lights to experiment with different moods.
Compositional Techniques
Move beyond standard compositional rules by experimenting with dynamic angles. Try shooting from extreme low angles or elevated positions. Introduce leading lines through carefully positioned props or architectural elements. Negative space, when used intentionally, can create powerful minimalist statements in your images.
Light and Shadow Manipulation
Mastering chiaroscuro (light-dark contrast) adds dramatic dimensionality to your work. Schedule shoots during golden hour for naturally sculpted lighting. Backlighting techniques can create stunning silhouette effects or ethereal glow around subjects. Practice with reflectors and diffusers to control shadow intensity and direction.
Utilizing Textures and Patterns
Build a library of textured backdrops - everything from rough concrete panels to delicate lace fabrics. These surfaces interact uniquely with light, creating visual interest. When shooting products, textured surfaces can elevate simple items into artistic compositions. Patterned elements add rhythm and movement to otherwise static scenes.
Playing with Depth of Field
Experiment with extreme aperture settings. Ultra-shallow depth of field (f/1.2-f/2.8) creates dreamy, selective focus effects. Conversely, small apertures (f/16-f/22) keep entire scenes in sharp focus for technical product shots or environmental portraits. Depth of field manipulation is one of the most powerful tools for directing viewer attention.
Adding Intriguing Elements
Curate a collection of unique props that reflect your artistic style. Vintage cameras, unusual fabrics, or natural elements like driftwood can add narrative depth to your images. These signature elements help develop your recognizable photographic style over time.
Employing Unique Editing Techniques
Develop customized presets in Lightroom or Photoshop that align with your brand aesthetic. Experiment with advanced techniques like frequency separation for skin retouching or luminosity masking for precise exposure adjustments. A distinctive post-processing style can become your visual trademark in a competitive market.
Read more about How to Create a Unique Photography Studio Design